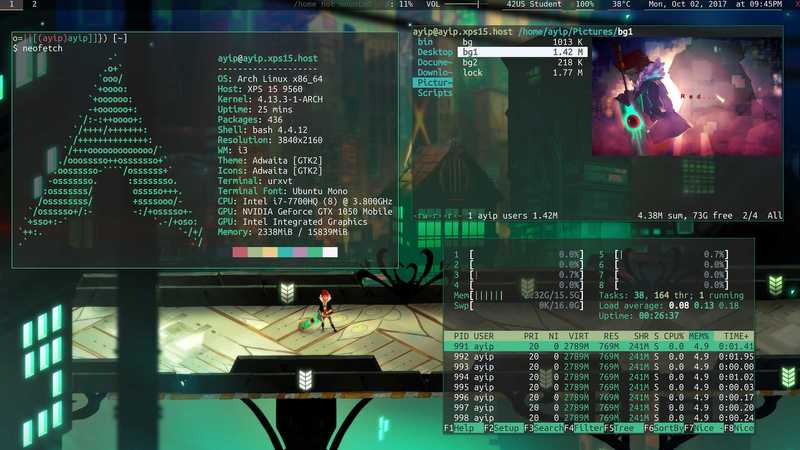
Arch Installation Guide
with HiDPI 4K UHD tips
Wed Oct 04 2017
0. Prep
- Get Rufus.
- Download the Arch installation image.
- Plug in USB (USB will be wiped).
- Select the Arch iso on Rufus, leave all settings default, click start. Skip to Section 1 if NOT dual booting with Windows
- <win> + <r>, type
diskmgmt.msc, enter. - Right click the main volume and select shrink. Just make some empty free space for Arch. Also account for the swap partition which should be the same size as RAM.
- Disable Fast Startup.
- Disable UEFI secure boot if machine has it in BIOS.
1. Init archiso env
- Boot into archiso using BIOS boot (i.e. pressing f12). If possible, boot using EFI boot.
Skip to Section 2 if ethernet is connected and
ping google.comworks. TODO Ethernet connection instructions ip linkto list wifi interfaces. Find out your wifi device name.wifi-menu [device name], thenping google.comto verify connection.
1.5 High DPI tiny text solution
pacman -Sy terminus-fontthensetfont ter-v32n. Also if you want bigger text in general. If no internet just dosetfont latarcyrheb-sun32as it’s the only default 8x32 font.
2. Partition
lsblkto check disk name of the place where you want to install Arch. It looks something like/dev/sda.cfdiskto make an EFI partition for booting ONLY IF your device does not have one, swap partition with size same as RAM, and then a filesystem partition. Write after each command.
3. Init swap
mkswap -L "Linux Swap" [swap partition name]. Usefdisk -lto find the name that looks something like/dev/sda2. Also refer back to this command to find partition name for filesystem and EFI.swapon [swap partition name].free -mto verify. It should have a size for swap in the last line.
4. Init filesystem
mkfs.ext4 -L "Arch Linux" [filesystem partition name]formats filesystem partition to ext4.mount [filesystem partition name] /mntmounts the partition to a port.
5. Init EFT
mkdir -p /mnt/boot.- If NOT dual booting with Windows,
mkfs.vfat [EFI partition name]. Keep your Windows EFI partition intact if dual booting. mount [EFI partition name] /mnt/bootmounts the EFI partition within the filesystem.pacstrap /mnt baseto install the base Arch Linux package on the filesystem and boot partition. Usebase-develinstead ofbasefor more development tools.genfstab -U -p /mnt >> /mnt/etc/fstabto create boot information containing partition information. Check withcat /mnt/etc/fstab.
6. Basic config
arch-chroot /mntto access the installed Arch Linux from archiso. Alsopacman -Sy dialog wpa_supplicant iwto usewifi-menuwhen booting directly to Arch.pacman -Sy intel-ucodefor intel processor info. Throw invimandterminus-fontas you see fit. Localevim /etc/locale.genand uncomment the line with your layout and timezone (e.g.en_US.UTF-8 UTF-8). Use another editor likenanoinstead ofvimas you see fit.locale-gen.echo LANG=en_US.UTF-8 > /etc/locale.conf.export LANG=en_US.UTF-8.rm /etc/localtime.ln -s /usr/share/zoneinfo/[continent]/[location] /etc/localtime. Use <tab> to list options in brackets.hwclock --systohc --utc.timedatectlto check time & date. Hostnameecho [hostname] > /etc/hostnamenames how your device shows up on networks.vim /etc/hoststhen add hostname after bothlocalhosts. Pacman swag-
vim /etc/pacman.confunderArchitecture = AutoaddILoveCandyandColoron their own lines so it looks like:... Architecture = Auto ILoveCandy Color ...Then add these to the end of the document:
[archlinuxfr] SigLevel = Never Server = http://repo.archlinux.fr/$arch update: "pacman -Syu" - If running 32-bit, uncomment the include line under
[multilib]Root and users passwdto set root password.useradd -m -g users -G wheel,storage,power -s /bin/bash [username]to create user.passwd [username]to assign password to said user.
7. Bootloader setup
bootctl installand pray.-
vim /boot/loader/loader.conf, delete everything in it and add:timeout 4 default arch -
vim /boot/loader/entries/arch.confand add:title Archlinux linux /vmlinuz-linux initrd /initramfs-linux.img initrd /intel-ucode.img options root=PARTUUID=[type ':r !blkid' and copy from Arch partition] rw - Alternatively,
blkid >> /boot/loader/entries/arch.confand then use your editor of choice to fill in the rest. ` - Skip the
intel-ucode.imgif you don’t have it in/boot - Reboot and pray to the gods
- Log back in as root
7.5 Nvidia + Intel GPU causes shutdown/reboot hang fix
vim /etc/modprobe.d/modprob.confand add these 3 lines:blacklist nvidia,blacklist nouveau, andoptions bbswitch load_state=0 unload_state=1.- If you wish to turn ON/OFF the GPU, enter:
sudo rmmod bbswitch/sudo modprobe bbswitch.
8. Install things as you see fit
xf86-input-synapticsfor touchpadmesaan open-source implementation of the OpenGL specificationbash-completionxorg-server xorg-apps xorg-xinitthat’s for window managersgvim git opensshgvim for the+clipboardover vim- Run
pacaur_helper.shin the Scripts folder.pacaursearches, installs, and manages packages from the AUR and behaves just likepacmanwhich is the best package manager tbh i3-gapsor wm of choiceurxvtor terminal emulator of choiceneofetchprints system info and ASCII art of the distro’s logocomptonis a composite manager that lets you do transparancy. As a result, you can add two more degit to the hex code (eg#000000->#88000000), where88is the hex code for the alpha channelfehmanages your desktop backgroundfirefoxor browser of choicefont-awesomefor glyphs,terminus-fontif you hadn’t already, and fonts of choicesudothen look up how to set up sudoers
9. Interface setup
- Reboot again
- Login as user
vim .bashrcand add in whatever you see fit you find in my.bashrc. Typebashto test those settings out- To set up i3 (or alternative) with
startx, add these lines to~/.xinitrc:xrdb .Xresources,xrandr --dpi 282if HiDPI,exec i3 -
To run
startxautomatically on login, add these lines to~/.bash_profile:if [ "$(tty)" = "/dev/tty1" ]; then startx && exit fi - Reboot and spend the next week debugging and ricing your Linux :^)
 This guide is tested on the Dell XPS 15 2017.
Courtesy of Alan